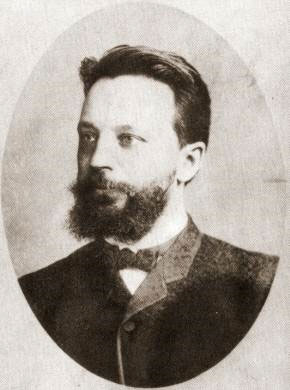
Monday, November 29, 2010

Capablanca vs Vidmar, New York 1927


We return again to Alexander Alekhine's book of the New York 1927 international tournament. The fourth-round game between J.R. Capablanca and Milan Vidmar quickly reached a "hedghog" type position that would become familiar territory in the later stages of the 20th century. Alekhine's notes are interesting as always, but there is an improvement, of which more later.

Capablanca – Vidmar, New York 1927
Queen's Indian Defence
Commentary by Alexander Alekhine

1.d4 Nf6 2.Nf3 e6 3.c4 b6 4.g3 Bb7 5.Bg2 c5

I have always considered this move to be unfavourable in this position because of the possible reply 6.d5. I prefer both 5...Bb4+ and 5...Be7.

6.O-O

Though quite playable, this reply is rather inoffensive in nature and allows Black to equalize the game in a number of ways.

6...cxd4 7.Nxd4 Bxg2 8.Kxg2 Be7

But this is inconsistent, because Black should be striving to rid himself of the weakness along the d-file as soon as possible. Although this aim would not be served by the immediate 8...d5 in view of 9.Qa4+ (as in the third match game Capablanca-Alekhine, Buenos Aires 1927), Black could make an effective preparatory move here: 8...Qc8!, for example: 9.b3 (9.Qd3 Nc6!) 9...Be7 10.Bb2 Qb7+ 11.f3 d5 12.cxd5 Nxd5 13.Qd2 0-0 14.e4 Nf6, etc.

9.Nc3 O-O(?)

Here too 9...Qc8 very much deserved attention, and if 10.b3 then 10...d5!

10.e4! Qc8

One move too late!

11.b3 Qb7 12.f3 Nc6 13.Bb2 Rfd8 14.Re1 Nxd4

Vidmar is playing the entire first part of the game inaccurately. Why, for example, does he develop the White queen in this position? Simpler was the immediate 14...d6.

15.Qxd4 Bc5(?)

Another obvious tempo loss!

16.Qd3 Be7 17.Rad1 d6

In spite of the multitude of inaccuracies committed by Black, his position is quite sturdy since in this varation the point d6 can, as is well-known, be defended without difficulty in the middlegame.

In the sequel Capablanca tries to make use of his last serious chance -- a flank attack. And indeed, this will demand exceptional accuracy from his opponent, who is very restricted in his freedom of action.

18.Re2 Rd7 19.Red2 Rad8 20.Ne2

Conclusively preventing – in the simplest way – the move ...d6-d5 (because of Bb2xf6 etc.)

20...Qa8

In order to retreat the knight to e8, which at the moment would be met by 21.e5!

21.Qe3 h6 22.h4 Qb7 23.a4

In order to prevent the freeing move b6-b5 once and for all.

23...Ne8 24.Nf4 Bf6 25.Bxf6 Nxf6 26.g4 Nh7

After this White's attack has very little chance of success because the knight on f4 is restricted by the necessity of keeping the square d5 under observation. As soon as the White knight gives up control over this square (for example, after Nf4-h5) then the move e6-e5 would immediately follow, creating interesting attacking possibilities for Black's knight.

27.Qc3 Nf8 28.g5 hxg5 29.hxg5 Ng6!

Completely correct. If now 30.Nh5, then 30...e5 31.Kg3 Qc7 followed by Rd8-f8, Qc7-d8, etc. Thus White has nothing better than to exchange.


30.Nxg6 fxg6 31.Qd4 Qc6

The square c5 is now a sufficient counterargument for Black.

32.Kg3 Qc5 33.f4 Kf7 34.Kg4 a5 35.Rh2 Qxd4?

Because it not to White's advantage to exchange queens (over the last few moves because of ...b6xc5 with pressure on the b-pawn, and at this moment because of ...d6xc5 followed by an invasion along the d-file), and retreating the queen (to c3 or b2) is also not good for him on account of ...d6-d5!, etc, then the simplest way for Black to draw here was to adhere to waiting tactics. Correct therefore was ...Kf7-g8-f7-g8, etc., leaving it to White to make a decision about transforming the position. That Vidmar willingly goes into an endgame that is very dubious (to say the least) can only be explained by time pressure.

36.Rxd4 Re7 37.Rhd2 Red7 38.f5

In my opinion this tempting advance should have been delayed for one move: 38.R4d3! Ke7 (or Ke8) 39.f5 gxf5+ (if 39...Kf7 then 40.fxe6+ followed by 41.Rd5 and then Rd5-b5, or e4-e5 when convenient, with advantage to White) 40.exf5 exf5+ [stronger is 40...e5!?, when Black should hold – tr.] 41.Kxf5 Kf7 42.g6+ with a winning position. And in other variations too it would be easier than after the move in the game to transform White's positional advantage into material gain.

38...gxf5+ 39.exf5 exf5+ 40.Kxf5 g6+ 41.Kg4 Kf8

The only defence – and a temporary one at that – against the threat of Rd2-f2-f6 with a winning position. If 41...Ke8 then 42.Rh2!, etc. (see below).

42.Rf2+?

This leads only to a draw. The proper way to realize the advantage that has cost White so much effort was – again – the win of a tempo: 42.R4d3!; then 42...Ke8 is met by 43.Rh2!, and after the exchange of a pair of rooks the remaining White rook penetrates to f6 or b8: 43...Kf8 (or 44...Rf7 44.Rh6, etc.) 44.Rf3+ Kg7 45.Rf6 (threatening 46.Rh6) 45...Rf8 46.Rxf8 Kxf8 47.Rh8+ followed by Rb8, etc. However, Capablanca forces the exchange of rooks under a different – and less advantageous – pawn configuration, after which Vidmar is able to save the game without difficulty.

42...Rf7 43.Rf6

If 43.Rfd2, then 43...Ke7 with a draw.

43...Rxf6 44.gxf6 Kf7 45.Kg5 Re8 46.Rxd6 Re5+ 47.Kf4 Re6

Much simpler than 47...Rf5+ and 48...Rxf6.

48.Rd5 Kxf6

Here it was possible to quietly draw the curtain.

49.Rb5 Ke7 50.Kg5 Rc6 51.Kh6 Kf8 52.Rg5 Kf7 53.Rg3 Re6 54.Rd3 Re5 55.Rd7+ Kf6 56.Rd6+ Kf7 1/2-1/2

With this we conclude our extract from Alexander Alekhine's book of the New York 1927 international tournament. But wait - there's an improvement!

Peelback

After Black's move 29...Ng6, Russian GM Sergei Shipov demonstrated the following imaginative continuation for White:

30.Nh5! e5 31.Rh1 a6 32.Rd5!! Rc8

If 32...b5 33.axb5 Ne7 34.f4 Nxd5 35.exd5 f6 36.g6 Kf8 37.Qh3, etc.

33.f4 b5 34.axb5 axb5 35.f5 bxc4 36.b4!

Thus far Shipov's analysis in his book The Complete Hedgehog, Volume 1. Here is a likely conclusion:

36...Ne7 37.Nf6+ gxf6 38.Qh3 Kf8 39.Qh6+ Ke8 40.Qh8+ Ng8 41.Qxg8+ Ke7 42.gxf6+ Kxf6 43.Rh6+ Ke7 44.f6+ Ke6 45.Qg4#!

Posting a rook on d5 in order to stabilize White's central position was unusual but very strong in this particular case.


Tuesday, November 16, 2010

The wandering king 2

In an earlier article we looked at a madcap king rush through the centre by Boris Shashin from a 1973 game against Viktor Korchnoi. Today we present another, even crazier example played in a Dutch open tournament a few years ago.

T.Burg (2268) – W.Spoelman (2461)
Scotch Game C45
Amsterdam (ACT) 2006

1.e4 e5 2.Nf3 Nc6 3.d4 exd4 4.Nxd4 Nf6 5.Nxc6 bxc6 6.e5 Qe7 7.Qe2 Nd5 8.c4 Ba6

Also possible is 8...Nb6, which I believe is the best move here. The problem with 8...Ba6 is that Black must play very accurately if the bishop is going to stay in play and not get stranded, so to speak.

9.Qe4 Nf6 10.Qe2 Nd5 11.Qe4 Nb6

As the higher-rated player, Spoelman has no interest in making a quick draw by repetition.

12.Nc3 Qe6 13.b3 Bb4 14.Bd2 Bxc3 15.Bxc3 d5 16.Qh4 dxc4 17.Rc1

Simpler is 17.Be2; for example, 17...0–0 18.0–0 Qf5 19.Rfe1 Rfe8 20.bxc4 Na4 21.Bd2 Rxe5 22.Bf3 with a slight edge to White. With the text move Burg is playing for complications – often a good policy if one is trying to win against a stronger opponent, but of course the opposite result is equally possible.

17...Qg6 18.bxc4

It is tempting to try to nail down the opposing king with 18.Bb4!?, but Black is doing fine after 18...Nd5 19.Ba3 Rb8 20.bxc4 Nb4 21.Bxb4 Rxb4 22.Rd1 Rb8; for example, 23.Bd3!? Qxg2 24.Be4 g5! 25.Bxg2 gxh4 26.Bxc6+ Ke7 27.Rd4!? Rb2! and Black is better.

18...0–0 19.Be2 Qxg2


20.Kd2?!?!

Objectively speaking this is leading with the chin, as they say in boxing. But psychologically – well, it's something else entirely. It's a bold attempt to freak out the opponent... and it works!

White could maintain equality with 20.Bd3 h5 21.Be4 Qg4 22.Qxg4 hxg4 23.Rg1 Bc8 24.Bxc6 Rb8 25.c5 Nd7 26.Rxg4 Nxc5 27.Rd4.

20...Rad8+ 21.Ke3 Qg6 22.Rcd1 Rxd1?!

Here is where Black starts to go wrong. He should not exchange rooks but instead he should open more lines with 22...f6! It is hard to see how White could survive after that.

23.Rxd1 Qc2?

Here too 23...f6 was stronger. The text is a bad mistake which is clearly based on a miscalculation – almost a hallucination in fact.

24.Bd3 Nxc4+

Black has seen this far, but unfortunately White doesn't have to take the knight.

25.Kf4!?

Even stronger is 25.Kd4! when Black is pretty well forced to resign immediately.

25...h6 26.Bxc2 g5+ 27.Kf5 Bc8+

27...gxh4 28.Rg1+ Kh8 29.e6+ f6 30.e7 Nd6+ 31.Kf4 Rf7 32.Bb3 and White wins.

28.Kf6 gxh4 29.Rg1+ Kh8 30.Ke7!


Completing the king's epic journey in triumphant fashion. Black has no defence and was forced to resign here. 1-0

Thursday, November 11, 2010

Alekhine vs Levenfish, Moscow 1920

It is a little-known fact that the winner of the first Soviet Championship in 1920 was none other than Alexander Alekhine. The contemporary title of the event was the First All-Russian Chess Olympiad, and it was only after 1922 – when the Soviet Union was formally established – that it was subsumed as part of the continuing series. Alekhine, of course, left his homeland in 1921, never to return. After his match victory over Capablanca in 1927, he reportedly made some anti-Soviet statements to a gathering of emigre Russians in Paris. His former compatriots immediately declared him persona non grata, and he was not rehabilitated until after the death of Stalin.

Along the way to winning the title in 1920, Alekhine had to survive a very difficult encounter with Grigory Levenfish (who won the title himself in 1937). Today we present an extract from Sergei Voronkov's 2007 book Masterpieces and Dramas from the Soviet Championships, 1920-1937. We pick up the action after Levenfish's 31st move ...Kg8-h7. From now on the commentary is by Voronkov.


32.Kg4!!


“The only way to draw,” exclaims Alekhine [in his 1921 book Schachleben in Sowjet-Russland - tr]. “If first 32.Qd3+ g6 and now 33.Kg4, then 33...f5+ 34.exf6 h5+ and wins.”


Alexander Kotov in his book Alekhine's Chess Heritage (1982) shows exactly how: “After the only move 35.Kh4! (35.Kg5 Rc5+) the win is achieved as follows: 35...Qxf6+ 36.Kh3 Qb2! 37.Kh4! Kh6! 38.Rh8+! Kg7!”


Go ahead and laugh, but this is just not true! You don't believe me?


If we extend the variation with the five exclamation marks for one more move – 39.Qd8! – the draw becomes obvious: 39...Rc8 40.Rg8+ Kh7 41.Qxc8 Qxh2+ 42.Kg5 Qxg3+ 43.Kf6 Qxf4+ 44.Ke7 Qe4+. Or 39..Qf6+ 40.Qxf6+ Kxf6 41.Rf8+ Ke7 42.Ra8 Rxh2+ 43.Kg5 Rg2 44.Rxa7, etc.


What's more, the alternative move 35.Kg5, which must seemingly be rejected in horror due to the “fatal” check 35...Rc5+, is in fact winning for White:

36.f5 Rxf5+ 37.Qxf5!! (and not 37.Kh4 Qxh2 mate) 37...gxf5 38.Rd7+ Kg8 39.Kg6! and it suddenly becomes clear that Black can avoid immediate mate only by giving up his queen! (By the way, I was very proud of my discoveries until I found out they had already been made in 2002 by the trainer L. Veretnovy from Krasnoyarsk.)

The most striking thing of all is that Alekhine's variation is doubly wrong. In the first place, as we have seen, it leads not to a win, but to a loss! In the second place, after 32.Qd3+ g6 33.Kg4 f5+, Levenfish in annotating the game in the Newsletter of the Petrograd Commune had already indicated a simple drawing line: 34.Kf3! Rc3 35.Rd7+ Kh8 36.Rd8+ with perpetual check. However, he too thought that 34.exf6 would lose on account of 34...h5+.

32...Rxh2

“Such a pity!” is Levenfish's lament in his book Selected Games and Reminiscences. “By continuing 32...h5+ 33.Kxh5 (33.Kxg5 f6+) 33...Rxh2+ 34.Kg4 Qg2 35.Qd3+ (if 35.Rd7 then 35...Rh6!) 35...g6 36.Rd7 (or 36.Kg5 Kg7 37.Rd7 Rh5+ 38.Kg4 Rh4+! and mates) 36...Kh6! 37.Rxf7 Rh4+! 38.Kxh4 Qh2+ 39.Kg4 Qh5#, Black would have brought this combative game to a beautiful conclusion.”

Indeed, it's a beautiful conclusion. Why then did Alekhine, in citing the alternative variation 32...g6 33.Rh8+! Kxh8 34.Qd8+ Kh7 35.Qe7! with a draw, restrict himself to the laconic comment, “If 32...h5+ then simply 33.Kxh5!” Was he mistaken yet again?

No, this time his analysis was accurate. It turns out that White is not obliged to play 36.Rd7? (also bad is 36.Rf8? Qh3+ 37.Kf3 Rg2 38.Rxf7+ Kh6 39.Ke4 Rxg3). One of Levenfish's parenthetical variations in fact leads to a draw: 36.Kg5! Kg7, and as before not 37.Rd7? but 37.Qa3! Rh5+ 38.Kg4 Qd2+ (or 38...Kh7 39.Rh8+ Kxh8 40.Qf8+ Kh7 41.Qxf7+ Kh6 42.Qf8+) 39.Qf3 Qh2 40.Qa3 with a repetition of moves.

33.Qd3+ g6 34.Rd7! Kg7

If 34...Rh4+? then 35.Kf3!

35.Rxf7+

Draw.

With this we conclude our extract from Voronkov's book.

Thursday, October 21, 2010

Euwe vs Geller, Zurich 1953


Here is a position from the game Euwe – Geller, Zurich (ct) 1953. It is on the menu today because it shows that the late middlegame is often characterised by inaccurate play, especially when the time control is approaching.

Black has the initiative and is trying to turn it into a decisive attack on White's king, which is the more exposed of the two. First, let's see how the game went:

55...Be3 56.Rf1 Qd2 57.Rf7 Qxe2+ 58.Kg3 Qe1+ 59.Kf3 Qh1+ 60.Kg3 Qg1+ 61.Kf3 Qf2+ 62.Ke4 Re8+ 63.Re7 Qh4+ White resigned (0-1).

The first impression is that the game took a normal course and ended in victory for Black. David Bronstein, for example, writing in his book Mezhdunarodny Turnir Grossmeisterov, does not query any of the last eight or nine moves. However, a closer examination reveals a dramatic exchange of blunders.

Peelback No. 1

Instead of 56.Rf1?, White should play 56.Rf7!, setting up the threat of 57.Rxb7 mate. Now Black is forced to work with checks; there is no time for a quiet move. Thus: 56...Qg1+ 57.Kf3 Qf1+ 58.Kg3 Bf4+ 59.Kg4. Bronstein reaches this position in his analysis and gives 59...h5+! “et cetera,” with the clear implication that Black is winning.

I always get suspicious when I see a note ending in “et cetera.” I like to carry on the analysis until the win is obvious. In this case there is a problem. After 59...h5+ 60.Kh4 Qf2+ 61.Kxh5 Qxe2+ 62.Kh4 Qe1+ 63.Kh5! there is no forced mate, no forced win of material, and no time for a quiet move. Black can even go wrong: 63...Qe5+?? 64.Qxe5 Bxe5 65.Nd7+ and wins. The first conclusion: 56.Rf7 draws. The second conclusion: 56.Rf1? is a weak move. The third conclusion: 55...Be3 is probably a weak move too.

Peelback No. 2

There is no good reason for Black to allow the move Rf3-f7 until he is ready with a winning continuation. Black can play a move that takes the square g4 away from the White king, so that if White does nothing significant, the attack beginning with Bf4-e3 will be far more dangerous. The move is:

55...h5!

Now White has:

A. 56.Qf7 Bc7! (changing direction in order to give Black's queen access to g5 in some lines) 57.Nd7+ Ka7 58.Nf8 Qg5+ 59.Kf2 Bh2 (also possible is 59...d3 60.Qxc7 Qh4+ 61.Qg3 Qd4+ 62.Kg2 d2 63.Rf1 d1Q 64.Rxd1 Qxd1 and Black is winning) 60.Qg6 Bg1+ 61.Kf1 Qc1+ 62.Kg2 Rd5 63.Ne6 Re5 64.Nf4 Be3 65.Rf1 Qd2 66.Qf7 Bxf4 67.Qxf4 Rxe2+ 68.Kg1 Qxb4 with a winning ending for Black;

B. 56.Qg6 Qd2 57.Rf2 Bc7 58.Qg7 Qe3 59.Qg6 Ka7 60.h4 Qe7 61.Nc4 (unavailing is 61.Qxh5 Rg8+ 62.Kf1 Qe4 and wins) 61...Qxh4 62.Nd6 Qe7 63.Qf6 Bxd6 64.cxd6 Qxd6 65.Qxd6 Rxd6 66.Rf5 Rd5 67.Rf4 d3 68.exd3 Rxd3 69.Rc4 Rd5 70.Kh3 b6 71.Rxc6 bxa5 72.bxa5 Rxa5 and White will have to give up his rook for Black's a-pawn.

I believe the moves 55...Qd2 and 55...Re8 also lead to a win for Black, but the pawn move is less complicated. The conclusion is that Black's move 55...Be3? threw away the win, but White's move 56.Rf1? gave it back.

When preparing his book The Application of Chess Theory for publication, Efim Geller found Bronstein's error, but did not notice his own error.


Sunday, October 17, 2010

Bird vs Chigorin, Vienna 1882, Part Two


Last time we presented the game Bird – Chigorin, Vienna 1882, with analysis by Solomon Lipschutz and supplemental comments by Mikhail Chigorin. Today we present the same game with annotations from the modern era by the Soviet grandmaster Evgeny Vasyukov, extracted from his 1973 book Mikhail Chigorin, co-authored with Alexander Narkevich and Alexander Nikitin.

Bird – Chigorin, Vienna 1882 Two Knights Defence C59

1.e4 e5 2.Nf3 Nc6 3.Bc4 Nf6 4.Ng5 d5 5.exd5 Na5 6.Bb5+ c6 7.dxc6 bxc6 8.Be2 h6 9.Nf3 e4 10.Ne5 Qc7 11.Ng4

This retreat is not considered the strongest. Instead of making the useful developing move 11.d4 or reinforcing his central position with 11.f4, White trades off his only active piece.

11...Bxg4 12.Bxg4 Bd6

A standard move in this system, and strong enough here because it stops White from castling. But 70 years after this game was played, one of our best masters of attack Rashid Nezhmetdinov suggested an even stronger plan in which both h2 and f2 are subjected to attack: 12...Bc5! 13.Be2 Rd8 14.c3 Nb7 15.0-0 h5! 16.d4 exd3 17.Bxd3 Ng4! The game Ciocaltea – Nezhmetdinov, Bucharest 1954, continued 18.Qe2+ Kf8 19.g3 Qd7 20.Be4 h4 21.Bf4 Nxh2! and Black won shortly.

13.h3

In a 1953 training game against Smyslov, Bronstein retreated his bishop to h3 with the idea of relocating it to g2. However this manoeuvre requires a lot of time and allows Black to increase the pressure: 13.Bh3 0-0 14.g3 Nd5 15.0-0 Rae8 16.d3 e3.

13...O-O 14.Nc3

Steinitz considered that 14.b3 was necessary here, hindering the transfer of Black's knight to the centre. But this move, which does nothing to aid White's development, can hardly change the nature of the struggle. Black would develop strong pressure on the central files, for example: 14...Be5 15.Nc3 Rad8 16.Bb2 e3! 17.fxe3 Bxc3 18.Bxc3 Ne4!

14...Nc4 15.b3?
White is playing the opening rather carelessly. Developing the bishop on b2 is a mistaken idea. The main events are bound to take place over on the kingside, where Black has directed all of his pieces. Therefore the following plan of development deserved attention: 15.Be2 Ne5 16.d3! (16.d4 Ng6 17.0-0 Nh4) 16...exd3 17.cxd3 Rad8 18.0-0. Of course, even here Black's edge in development would guarantee him the initiative, but it would be far easier for White to defend than in the game.

15...Ne5 16.Bb2 Rfe8 17.O-O

It is too late for White to retreat his bishop (17.Be2 Nf3+! 18.Kf1 Nh4) so he hurries to get his king out of the centre. However, this loses a pawn.

17...Nexg4 18.hxg4 Qd7 19.Qe2

Defending the pawn on g4 would lead to the creation of other weaknesses: 19.f3 Bc5+ 20.Kh1 Rad8 21.Na4 Bd4!

19...Nxg4


Diagram

A critical moment. With material being equal White can hardly count upon a successful defence. But can he capture the pawn on e4? This makes use of the fact that after 20.Nxe4 Black cannot play 20...f5 because of 21.Qc4+. The risk appears to be substantial. The pin on the knight is very unpleasant and enables Black to obtain the advantage in two ways: 20.Nxe4 Bh2+ 21.Kh1 Bc7 22.f3 f5 23.Qc4+ Kh8 24.Nf2! Qd6 (for example, 25.Nxg4 fxg4 26.f4 Qg6) or 20...Qf5 21.f3 (sacrificing the queen does not work: 21.Nxd6 Qh5 22.Qxg4 Qxg4 23.Nxe8 Rxe8 24.Rfe1 Rxe1+ 25.Rxe1 Qf5 26.d3 Qa5!) 21...Qh5! 22.fxg4 Qh2+ 23.Kf2 Qf4+ 24.Kg1 Rxe4 25.Rxf4 Rxe2 26.Rf2 Re4 (Chigorin). Nevertheless, if White wants to choose the least of evils, he should try to find salvation in this endgame. In declining to take the pawn he dooms himself to a prospectless defence.

20.g3 Qf5 21.Kg2 Re6 22.Rae1

Exchanging the e-pawn with 22.f3 exf3+ (22...Qe5 23.f4!) 23.Qxf3 does not save White from the attack after 23...Qg6!

22...Rae8 23.Rh1 h5!

Winning the exchange with 23...Qxf3+ 24.Qxf3 exf3+ 25.Kxf3 Rxe1 26.Rxe1 Rxe1 27.Kxg4 Be5 would also guarantee Black victory, but it would take much longer. He still has ways of strengthening the attack, and Chigorin decides to press on with them. The threat now is 24...Qf3+, winning a rook since the knight on g4 is defended.

24.Ref1 Qg6! 25.Nd1

Diagram

Black has apparently retreated his queen in order to make way for his f-pawn, and here in fact 25...f5 26.Ne3 f4 would also give him an irresistible attack. But Chigorin demonstrates an unexpected combinative possibility.

25...e3!

Now it becomes clear that the square g3 cannot be defended against intrusion by the Black queen, since after 26.Nxe3 Nxe3+ 27.dxe3 there follows 27...Rxe3 28.Qxh5 Rxg3+ and mate on the following move.

26.Bd4 Nxf2 27.Rxf2 Qxg3+ 28.Kf1 exf2 29.Ne3 c5 30.Bc3 Rxe3! 31.dxe3 Rxe3 32.Qd1 h4 33.Bd2 h3!

White resigned (0-1).

Here we conclude our extract from Vasyukov's 1973 analysis as well as our two-part excursion into master chess of the late 19th century.


Friday, October 15, 2010

Bird vs Chigorin, Vienna 1882, Part One


The Russian master Mikhail Chigorin compiled an amazing record on the Black side of the Two Knights Defence. Over the course of his career he employed this counterattacking system in a total of 17 games, mostly against the world's elite. He scored 13 wins, 1 draw, and only 3 losses for a winning percentage of 79%, far in excess of the standard 45% that Black can expect from the starting position. In particular his great rival Wilhelm Steinitz was bested by a score of four games to one.

Why was Chigorin so successful with the Two Knights Defence? In the first place, he was a fine attacking player with a strikingly modern feel for the initiative and the importance of piece activity. He was also aided by the generally low reputation enjoyed by the Two Knights Defence in those days. This reputation was based in large part on the writings of his rival Steinitz, who famously believed that “a pawn is worth a little trouble.” In particular, Steinitz believed that Black did not have the right to sacrifice a pawn in the opening. For his part, Chigorin didn't care what Steinitz (or anyone else) thought was right or wrong. He saw the assets in Black's position and worked hard to make them count.

Today we present a lesser-known but particularly fine example of Chigorin's play in the Two Knights Defence – his game with the English master Henry Bird from the great Vienna tournament of 1882. This event, by the way, was won by Steinitz after a playoff match with Simon Winawer. Chigorin finished 12th and Bird 15th out of 18 participants.

The Bird-Chigorin encounter did not go unnoticed by the contemporary chess press. It appeared in the Russian magazine Shakhmatny Vestnik in 1885, and later in The Chess-Player's Manual by Gossip and Lipschutz (1888). It also came to the attention of Wilhelm Steinitz, who included it in Part 1 of his two-volume opus The Modern Chess Instructor (1889).

While preparing his 1950 commemorative book on Chigorin, Nikolai Grekov gained access to the Russian master's archives, including a copy of The Modern Chess Instructor. There he found some pencilled comments to the Bird-Chigorin game in which Chigorin expressed disdain for aspects of Steinitz's analysis. Needless to say, these comments were included in Grekov's book in order to demonstrate that, even in analysis, Chigorin could hold his own against his rival.

In preparing this article I had occasion to refer directly to The Modern Chess Instructor, where I found the following caveat by Steinitz, which had been conveniently omitted from Grekov's book: “Our notes to this game are chiefly quoted from the Appendix to Gossip's Manual by S. Lipschutz.” Chigorin would have known this, so his disdain would have been largely directed at Lipschutz instead of Steinitz. However, Steinitz was ultimately responsible for the content of his book. In our article today, the comments by Steinitz/Lipschutz have been slightly edited for clarity. Chigorin's pencilled comments appear in italics, and there are two further comments of his from Shakhmatny Vestnik.

Bird-Chigorin, Vienna 1882 Two Knights Defence C59

1.e4 e5 2.Nf3 Nc6 3.Bc4 Nf6 4.Ng5 d5 5.exd5 Na5 6.Bb5+ c6 7.dxc6 bxc6 8.Be2 h6 9.Nf3 e4 10.Ne5 Qc7 11.Ng4

11.d4 exd3 (and if one does not capture en passant?) 12.Nxd3 Bd6 13.Nd2 followed by Nf3 would give White an excellent game with a pawn ahead. For should Black then attempt 13...Bxh2, then would follow 14.g3 Bxg3 15.fxg3 Qxg3+ 16.Nf2 and should win.

11...Bxg4 12.Bxg4 Bd6 13.h3 O-O 14.Nc3

White would have done better first to prevent the entrance of the hostile knight by 14.b3. Rubbish; then comes 14...Be5 15.Nc3 e3 16.fxe3 Bxc3, etc.

14...Nc4 15.b3 Ne5 16.Bb2 Rfe8 17.O-O

17.Be2 Nd3+ (or 17...Nf3+ 18.Kf1, etc.) (Just so: “et cetera.” And how will things turn out for White after 18...Nh4?) 18.cxd3 exd3 19.0-0 was far more favourable for White.

17...Nexg4 18.hxg4 Qd7 19.Qe2

If 19.f3 Bc5+ 20.Kh1 Qe7 with a winning attack.

19...Nxg4 20.g3

20.Nxe4 Qf5 21.f3 Qh5 22.fxg4 Qh2+ 23.Kf2 Qf4+ (or 23...Qh4+ 24.g3 Bxg3+ 25.Kg2 and should win; if here 24...Qh2+ 25.Kf3 Qxe2+ 26.Kxe2 Rxe4+ 27.Kf3 with a pawn ahead) 24.Kg1 was by far better play, for Black's best plan would be now to draw by perpetual check. What on earth for? After 24...Rxe4 25.Rxf4 Rxe2 26.Rf2 Re4! Black's position is better – perhaps significantly so.

20...Qf5 21.Kg2 Re6 22.Rae1

Ill-judged. 22.Rh1 followed by 23.Raf1 was much better.

22...Rae8 23.Rh1 h5!

Black could win the exchange by playing 23...Qf3+ but after 24.Qxf3 (24.Kg1 Bxg3!) exf3+ 25.Kxf3 Rxe1 26.Rxe1 Rxe1 27.Kxg4 play would continue for quite some time. Now, having defended his knight, Black threatens 24...Qf3+ (Chigorin, Shakhmatny Vestnik, 1885).

24.Ref1 Qg6 25.Nd1

Premature. 25.Rh3 was necessary for the defence. Black was threatening 25...e3 26.dxe3 Nxe3 (Chigorin, Shakhmatny Vestnik, 1885).

(diagram)

25...e3!

A real master coup which forces the victory in elegant style.

26.Bd4

If 26.dxe3 Nxe3+ 27.Nxe3 Rxe3 threatening 28...Rxg3+ and wins.

26...Nxf2 27.Rxf2 Qxg3+ 28.Kf1 exf2 29.Ne3 c5 30.Bc3 Rxe3

Beautiful play, which finishes off the quickest way.

31.dxe3 Rxe3 32.Qd1 h4

32...Rxc3 followed by 33...Kf8 (if White reply 33.Qxh5) was also good enough.

33.Bd2 h3

White resigned (0-1)

Next time we will present this game with more modern annotations. Stay tuned!

Sunday, September 19, 2010

Marshall vs Alekhine, Bradley Beach 1929

A couple of weeks ago, Eduardo Moura and I were analysing some tournament games played by Alexander Alekhine. One in particular – a queen ending – caught our eye because of the way Alekhine managed to fashion a win out of very thin material. The opponent was Frank Marshall, and the venue was the Bradley Beach tournament of 1929. (This, by the way, was Alekhine's first official event following his defeat of Capablanca in 1927.) Here is the game with annotations by Soviet GM Alexander Kotov, taken from Volume 2 of his book Shakhmatnoe Nasledie A.A. Alekhina:

In queen endings, as in other types of endings, an outside passed pawn sometimes plays an important role. Thus in the following game of Alekhine's, White's queen was deflected by a strong Black passed pawn on the a-file while White's own passed pawn on the d-file was easily held in check by the centralised Black king.

1.d4 Nf6 2.Nf3 e6 3.e3 c5 4.Bd3 d5 5.c3 Bd6 6.O-O Nbd7 7.Nbd2 O-O

A well-known variation of the Colle System. This opening was once considered rather threatening, but after several equalising methods were found for Black it was eventually reassessed as insufficient for advantage.

8.e4

White has to acquiesce to an isolated pawn on d4 because the preliminary exchange on c5 does not work. It was precisely for this reason that Black developed his knight on d7.

8...cxd4 9.cxd4 dxe4 10.Nxe4 Nxe4 11.Bxe4 Qb6!

This move is considered strongest. Black attacks the b-pawn and prevents the development of White's bishop on c1.

12.Ne5

This advance is tactically justified by a double attack: 12...Bxe5 13.dxe5 Nxe5 14.Bxh7+ followed by 15.Qh5+. However, stronger was the natural 12.Qe2 followed by 13.Be3 or 13.Bg5.

12...f5

Decisively preventing any White attempt to attack on the kingside. In the sequel Alekhine skilfully defends the resulting weakness on e6.

13.Nxd7 Bxd7 14.Bf3 Bc6 15.Re1 Kh8! 16.Bg5

Not falling for the trap 16.Rxe6? Bxf3 17.Qxf3 Bxh2+.

16...Rae8 17.Rc1

This enables Alekhine to seize the initiative and obtain the better position. More promising was 17.Bxc6.

17...Bxf3 18.Qxf3 Qxb2 19.Rb1 Qxa2 20.Rxb7 Rb8 21.g3

Marshall makes an escape square for his king so that he can follow up with 22.Reb1, which at the moment is not possible because of 22...Qxb1+! However, this pawn move gives Alekhine the opportunity to exchange bishops and at the same time inflict serious damage on the pawn cover in front of Marshall's king.


21...f4! 22.Bxf4

Capturing on f4 with the pawn is worse because of 22...h6.

22...Bxf4 23.gxf4 Rxb7 24.Qxb7 Qd2

The heavy piece ending is favourable for Black. All four of White's pawns are isolated and weak, and his king is exposed. However, the reduced material does not allow Alekhine to decide matters in the so-called “fourth stage” of the game [i.e., a mating attack in the endgame – tr.]. Eventually he has to agree to an exchange of rooks.

25.Qe4 h6 26.Qe3 Qb2 27.Qe5 Rf6 28.Re3 Qb1+ 29.Kg2 Qb7+ 30.Kg1 Qf7 31.Qb8+ Kh7 32.Qb1+ Rf5 33.Qe4 Qf8 34.Re2 a5

After some extensive probing manoeuvres, Alekhine finally sets his passed pawn in motion. This forces Marshall to start thinking about creating his own passed pawn.

35.Qxe6 Rxf4 36.d5 Rd4 37.Re4 Rd2 38.Re2 Rxe2 39.Qxe2 Qf5

On the surface the queen ending appears to be absolutely equal, but this is not the case at all. There is no doubt that Black stands better. In the first place, his king is much more secure than White's, although this is not the decisive factor. The main thing is that Black's passed pawn is the cause of many worries for White's queen, distracting her from any sort of attack on Black's kingside. Meanwhile, White's pawn on d5 will be held in check by Black's soon-to-be centralised king. It is interesting to follow how the World Champion is able to realise an apparently insignificant advantage against such a strong player as the American grandmaster.

40.Qd1 Qg6+ 41.Kf1 Qa6+ 42.Kg2 Qd6 43.Qd4 Kg8

The king sets off toward the pawn on d5 in order to assist the queen in either holding up this dangerous pawn or even capturing it.

44.Qc4 Kf7 45.Qb5 Qd8 46.f4

In order to deprive the Black king of the square e5 in case he decides to settle on d6.

46...Qc7 47.Kf3 Qc3+ 48.Kg4

Here is the first indicator of the power of the outside passed pawn. The White king cannot go to e4 because then 48...Qb4+ would lead to an easily-won pawn ending.

48...Ke7 49.Qb6

Marshall does not notice the World Champion's clever tactical trick. He had to play 49.h4, preventing the following “hammer blow” by the Black pawn. But even then 49...Kd6 would leave Black with reasonable winning chances.


49...h5+!

This forces White's destruction within a few moves.

50.Kxh5

White has to take; otherwise Black forces the exchange of queens with a check on f6.

50...Qh3+ 51.Kg5 Qg2+ 52.Kf5

Or 52.Kh4 Qxh2+ 53.Kg4 Qg2+ 54.Kh4 Qxd5 and with his extra pawn Black must win.

52...Qxd5+ 53.Kg6

White cannot avoid the pawn ending in any case.

53...Qd6+ 54.Qxd6+ Kxd6 55.f5 a4 56.Kxg7 a3 57.f6 a2 58.f7 a1=Q+ 59.Kg8 Qg1+

White resigned.

With this we conclude our extract from GM Kotov's book.

I will only add the observation that Alekhine was particularly skilled in his conduct of queen and pawn endings. Anyone who looks up his games will find many similar examples.


About Me

My photo
Port Coquitlam, British Columbia, Canada
National master (Canada) since 1984. B.C. Champion 1977 and 1984. Runner-up 1991 and 2002. B.C. Open Champion 1972 and 1982. B.C. U/14 Champion 1964-65-66. Mikhail Botvinnik once wrote that publishing your analytical work forces you to be accurate because it exposes you to criticism. Hence this blog.